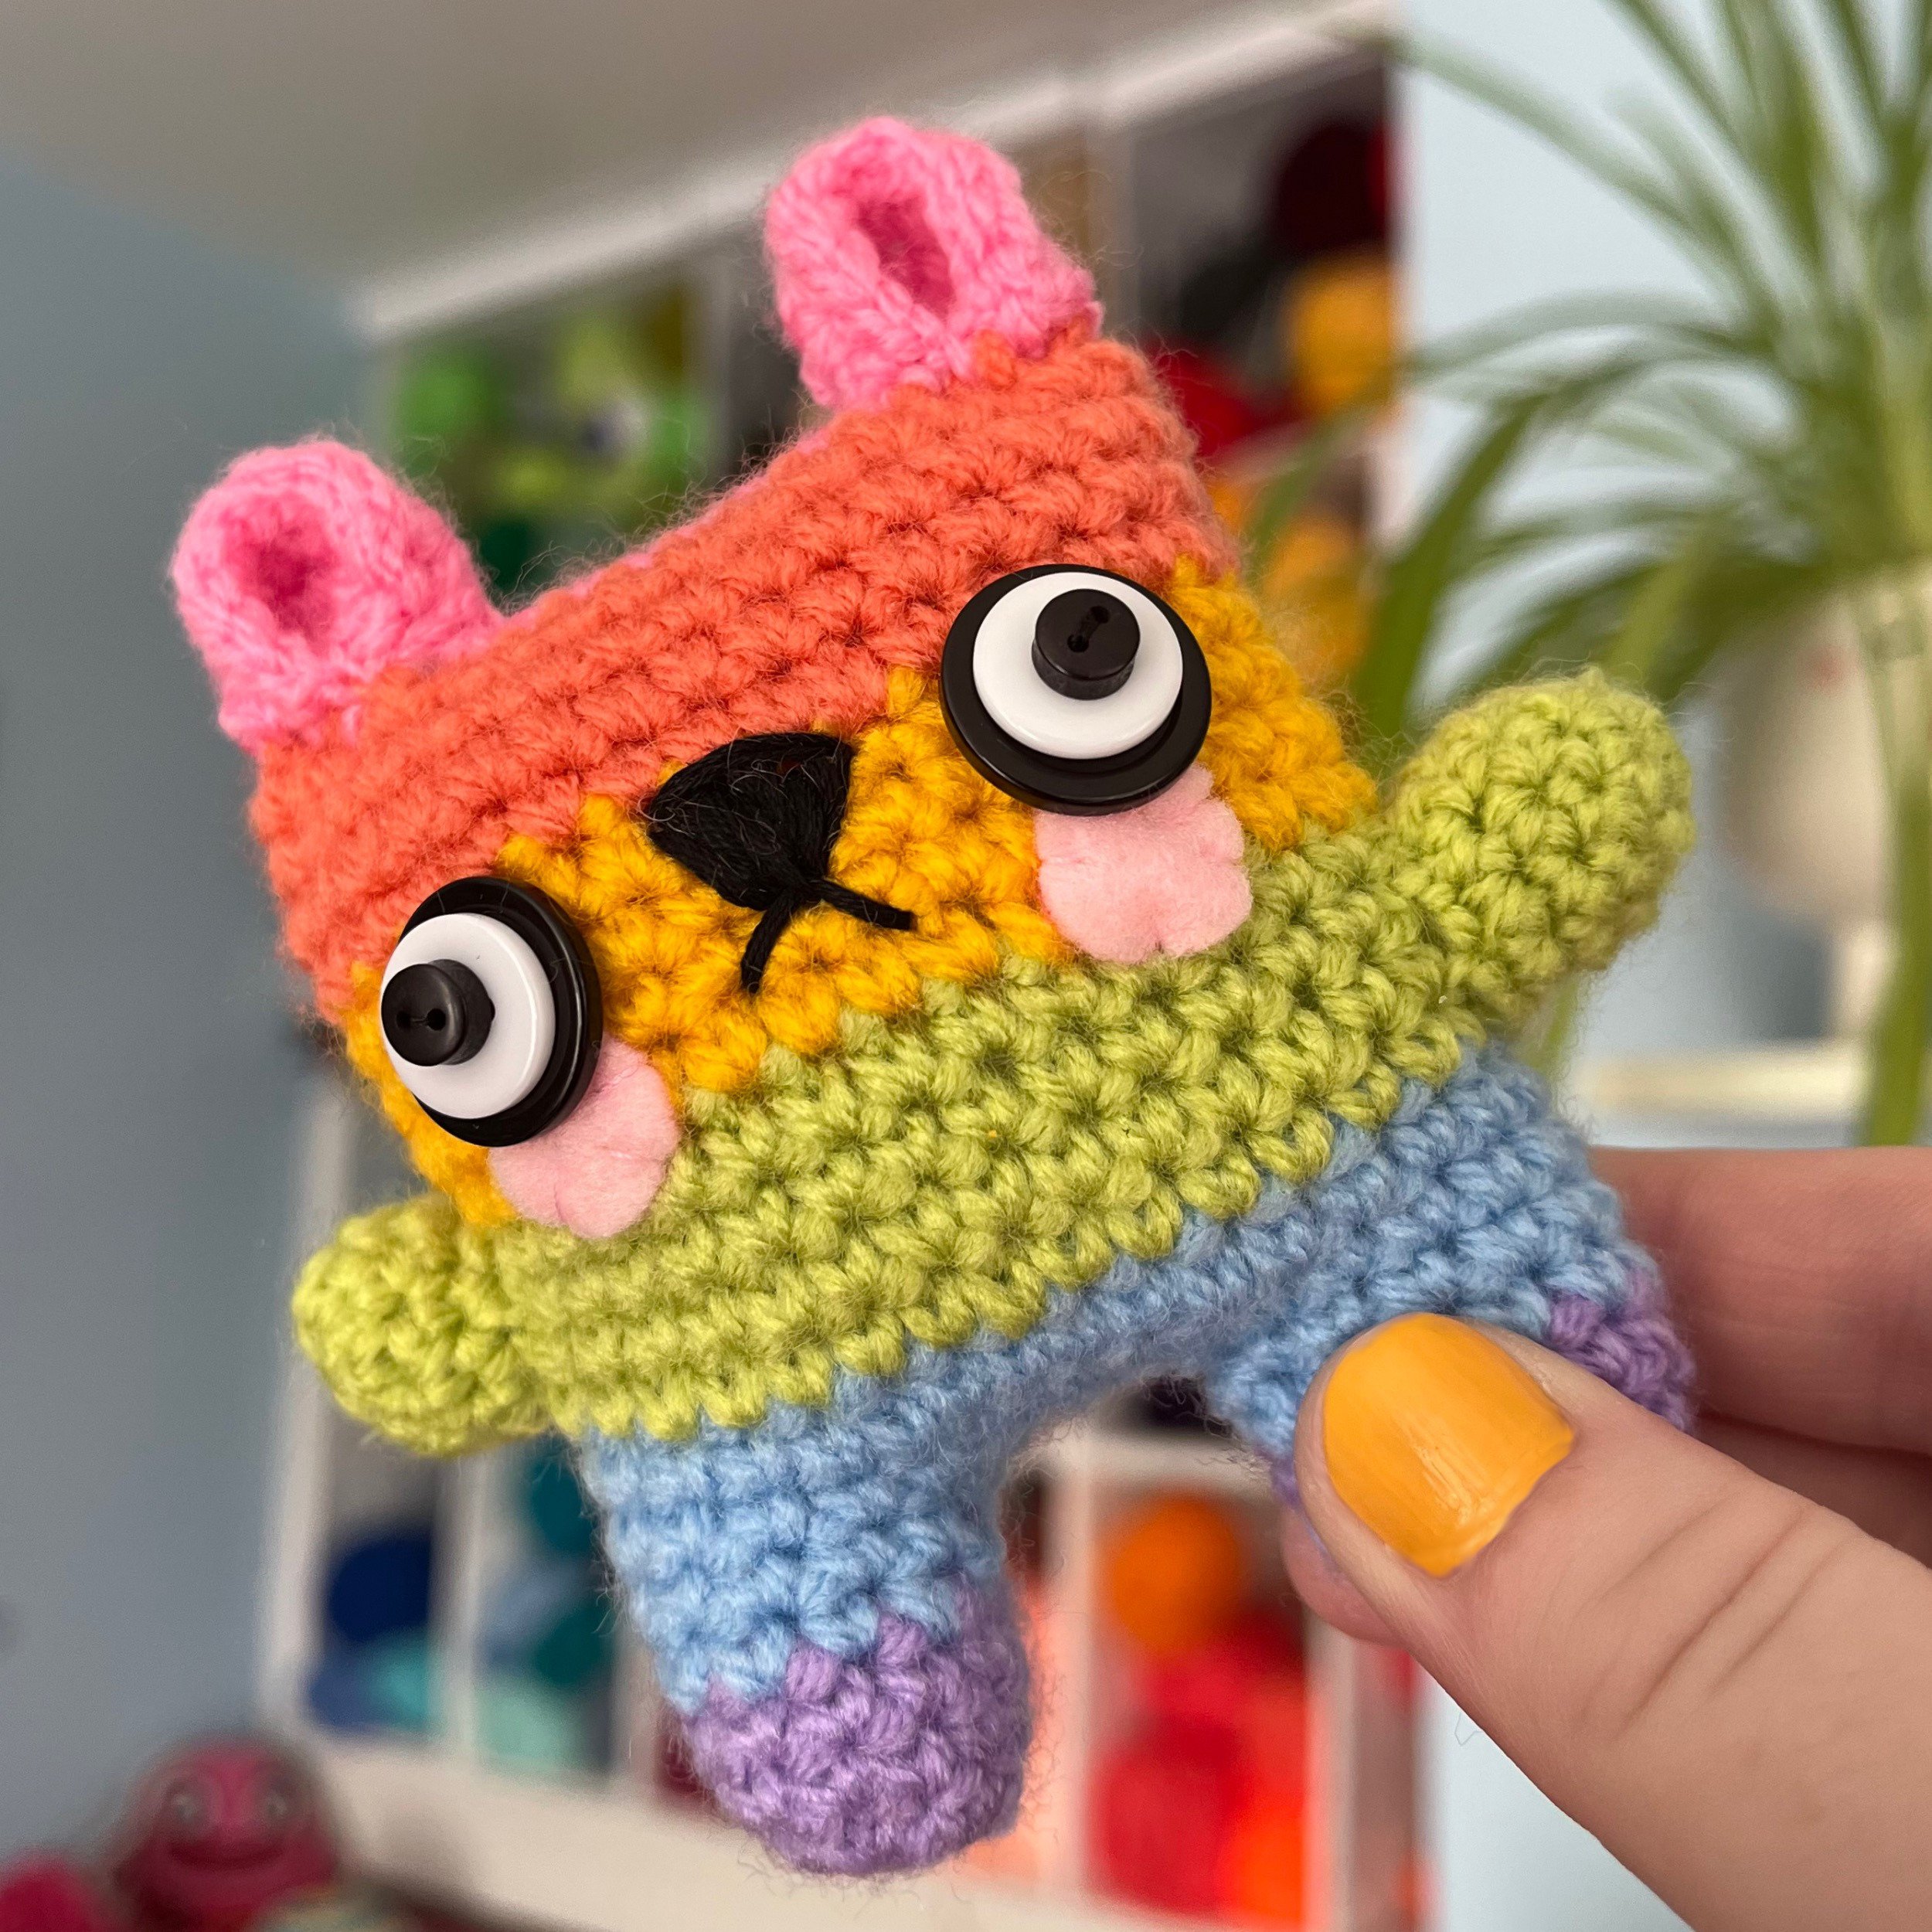
Pocket Pals

You Will Need
Crochet Hook (I used 2.75mm [C])
Double Knit/Light (3) Weight Yarn in Lilac, Blue, Green, Yellow, Orange and Pink
Safety Eyes or Button Eyes (Sizing Guide Below)
Stitch Markers Or Piece Of Scrap Yarn
Yarn/Embroidery Needle
Embroidery Thread in Black
(Optional) 2 x 12mm Pink Felt Circles
Fiberfill Or Other Stuffing
Make your own army of Pocket Pals!
Abbreviations
Ch - Chain Stitch
Sc - Single Crochet
Inc (Increase) - 2 Sc into 1 St
Slst - Slip Stitch
St/Sts - Stitch/Stitches
** - Marks a group of stitches to be repeated until the round is completed
Button Size Guide
I mainly use button eyes for my amigurumi - as a rough size guide you will need a main, outer black Clown/Coat button; a flat white button a few mm smaller than the black Clown/Coat button; and a flat black “pupil” button a few mm smaller than that. For Pocket Pals, I use:
15mm Black Clown/Coat Button
11mm White Flat Button
6mm Black Flat“Pupil” Button
** I sell Button Packs in my Etsy Pattern Shop! I use size Small for these particular amigurumi
If you’d like to use Safety Eyes instead, for Pocket Pals made with the recommended yarn weight I would think a 10mm or smaller Safety Eye would work well :)
Gauge
No gauge, just keep your stitches nice and tight to avoid gaps in your work. Your end toy will be bigger/smaller depending on yarn weight - the example toy is made using DK/Light (3) weight yarn. For amigurumi, always use a hook a couple of sizes smaller than the suggested size for that yarn weight
Finished Size
10cms approx. using a 2.75mm (C) hook and DK yarn
Other Info
As this is amigurumi, work in continuous rounds - in a spiral - unless otherwise stated. Don’t join at the end of a row; just keep going
Use stitch markers or a piece of scrap yarn to mark the start of every round. Replace at the start of the next round as you go along. This will help you keep track of where you started, and saves a lot of time if things go wrong!
I write my patterns in American terms, so Sc means US Single Crochet; Dc means US Double Crochet etc
The number at the end of each round is the number of stitches you should now have

Leg 1
In Lilac
1. Ch2, Sc 6 into 2nd Ch from hook, or Magic Ring 6 (6)
2. Inc around (12)
3 - 4. Sc around (12 Sc)
Switch to Blue
5. Sc around (12 Sc)
*Bind Off - Leaving a long tail to sew the gap between the legs closed*
Leg 2
In Lilac
1. Ch2, Sc 6 into 2nd Ch from hook, or Magic Ring 6 (6)
2. Inc around (12)
3 - 4. Sc around (12Sc)
Switch to Blue
5. Sc around (12 Sc)

*Joining the Legs*
6. Chain 5, Sc into a Stitch on Leg 1. Sc around Leg 1 a further 10 Sc (11 Sc on Leg 1 total). There should be a Sc on Leg 1 that hasn’t been stitched into.
Chain 5, Sc into a Stitch on Leg 2, leaving a 1 Sc gap between the legs (1 skipped Stitch on each Leg). Sc around Leg 2 for another 10 Sc (11 Sc on Leg 2 - 22 Sc total around plus 2 x Ch5)
Continuing in Blue
7. Sc in each Sc and Ch around (32 Sc)
8. Sc around (32 Sc)
Switch to Green
9 - 12. Sc around (32 Sc)
Switch to Yellow
13 - 16. Sc around (32 Sc)
Switch to Orange
17-20. Sc around (32 Sc)
Switch to Pink
21. Sc around (32 Sc)
*Bind Off, Leaving a long tail for sewing the head shut*
Ears (Make 2)
In Pink
1. Ch2, Sc 5 into 2nd Ch from hook, or Magic Ring 5 (5) Ch 1, Turn
2. *Sc, Inc* x 2, Sc across (7 Sc). Ch 1, Turn
3. *Sc, Inc* x 3, Sc across (10 Sc) Ch 1, Turn
4. Sc across (10 Sc)
*Bind Off, Leaving a long tail for sewing*
Arms (Make 2)
In Green
1. Ch2, Sc 6 into 2nd Ch from hook, or Magic Ring 6 (6)
2. *Inc, Inc, Sc* x 2 across (10 Sc)
3 - 5. Sc around (10 Sc)
*Bind Off, Leaving a long tail for sewing*
Assembly
If using Safety Eyes - insert them now to around Row 16 (Last Yellow Row)
Stuff Legs, then the Body Lightly
Sew the gap between the legs closed using the tail left from Leg 1
Stuff remainder of the Body now
Sew top of Head shut, straight across from right side to left
Take each Arm, Stuff, Sew to sides of Body (between Rows 9 - 12, the Green Rows)
Take each Ear, Fold in half Vertically and sew to the top corners of the Head
(OPTIONAL) If adding Cheeks - sew them in place now, to around Row 13 - 14 (Yellow Rows)
Using Black Embroidery Thread - sew on a triangular nose and a V shaped mouth
If using Button Eyes - Sew on now - Layering both sets of 3 buttons on top of each other
*You’re Done!*
I hope you enjoyed making your Pocket Pal!
Why not try making your Pocket Pals in your favourite flag or cause colours!
I’d love to see your creations over on Instagram! @wonkyworldcreations

(c) Sarah Hearn 2022
Feel Free to sell anything you make from any of my patterns, paid or free.
I would appreciate a credit if selling Online.
Please do not sell/re-publish this pattern.
Many thanks <3